Microsoft Outlook uses a proprietary data format, “PST” (Personal Storage Table), to store emails, appointments or tasks. It was not until 2010 that the specifications of this format were made public, which probably explains why few tools are available to open it and use its data.
Under Python, however, there is the libpff library that allows most metadata to be exported. The following lines show how to use it to graph incoming emails.
Installation of libpff
Like all Python libraries, libpff can be installed with pip:
pip install libpff-python
However, at the time of writing, the version proposed by pip (20161119) does not allow to retrieve the time of the messages. Corrections have been made in a more recent version (20190725), available with:
pip install libpff-python-ratom
Retrieving emails
File opening
First we load the library:
import pypff
Then we open our file: the opening can nevertheless be quite long depending on the size of your archive.
pst = pypff.file()
pst.open("mails.pst")
Metadata extraction
It is possible to navigate through the structure using the functions offered by the library, from the root:
root = pst.get_root_folder()
To extract the data, a recursive function can then be used:
def parse_folder(base):
    messages = []
    for folder in base.sub_folders:
        if folder.number_of_sub_folders:
            messages += parse_folder(folder)
        print(folder.name)
        for message in folder.sub_messages:
            messages.append({
                "subject": message.subject,
                "sender": message.sender_name,
                "datetime": message.client_submit_time
            })
    return messages

messages = parse_folder(root)
This function can be quite slow depending on the number of messages (about 300 messages are processed per second on my computer).
Once this is done, can then import this file into Pandas:
import pandas as pd
df = pd.DataFrame(messages)
Time conversion
The hours extracted from the file are stored in UTC format, which means that you will have to reprocess the correct time zone. First, the time zone is declared UTC, then converted to the desired time zone:
df['datetime'] = df['datetime'].dt.tz_localize(tz='UTC')
df['datetime'] = df['datetime'].dt.tz_convert(tz='Europe/Paris')
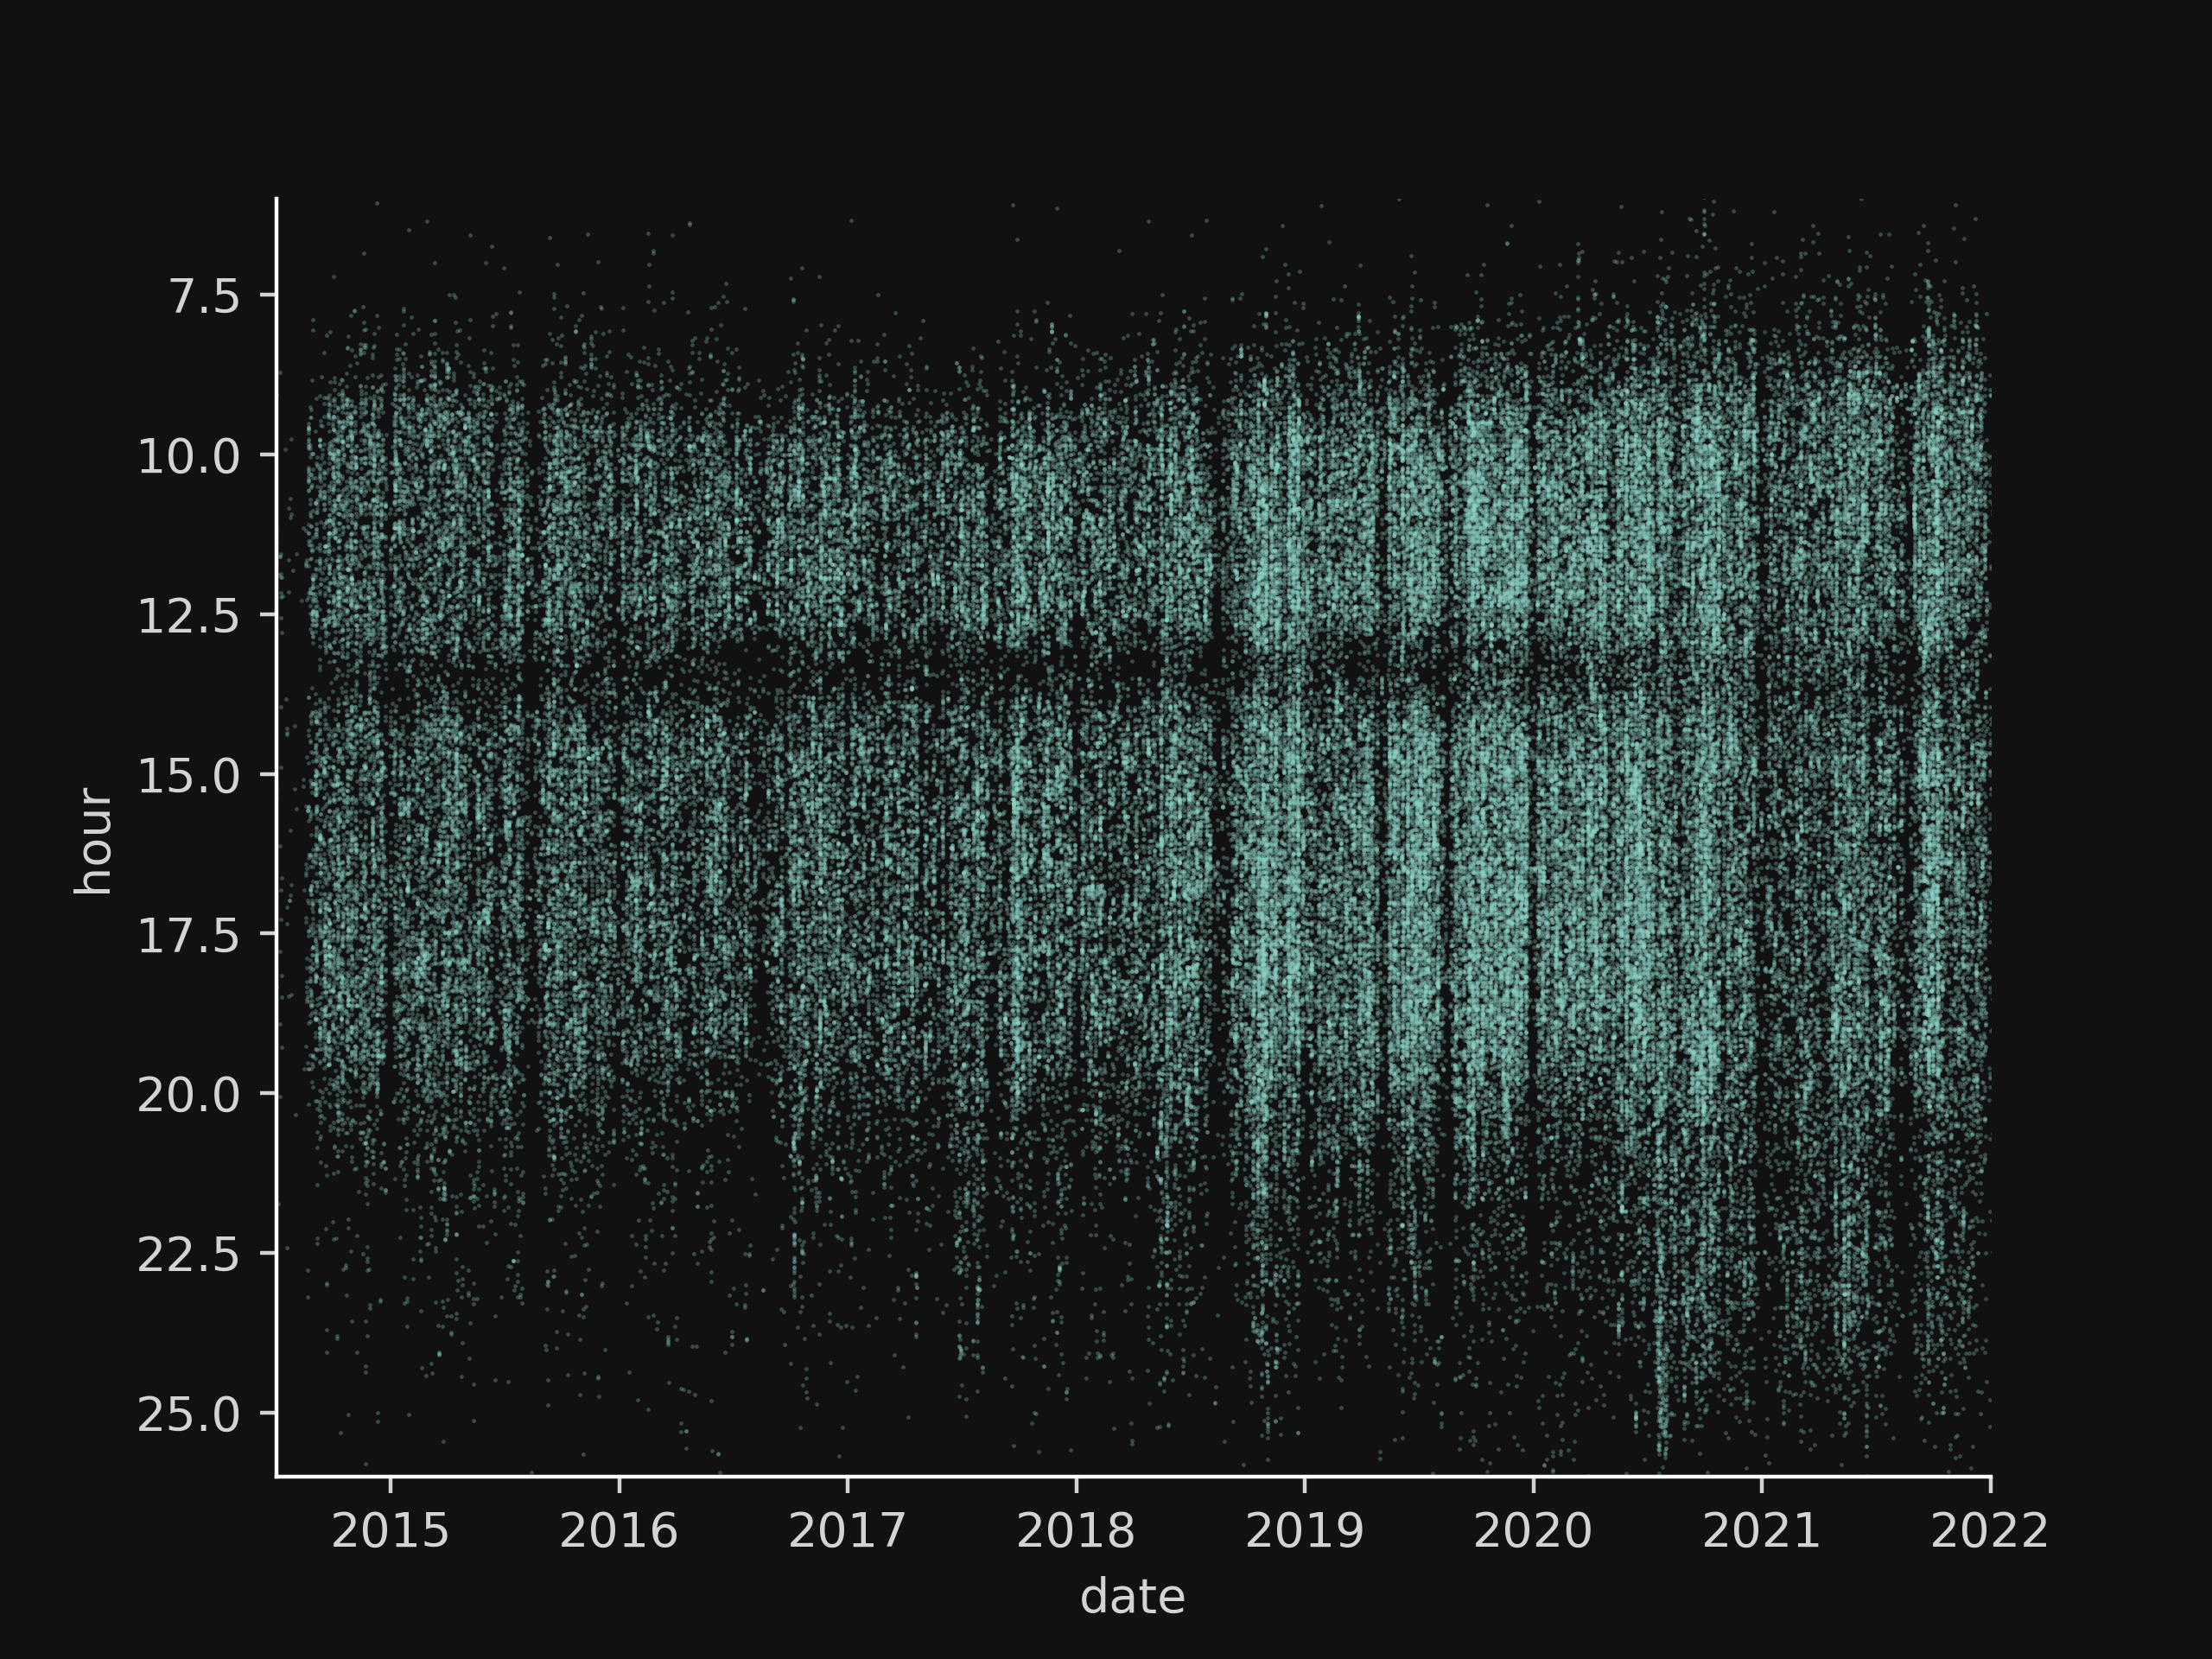
Plot example
We will plot a point cloud showing the arrival time of emails by date. To do this, two columns are created with the coordinates of the points to be traced:
df['hour'] = df['datetime'].dt.hour + df['datetime'].dt.minute / 60
df['date'] = df['datetime'].dt.year + df['datetime'].dt.dayofyear / 365
Then we trace:
import matplotlib.pyplot as plt
import seaborn as sns

plt.clf()
ax = sns.scatterplot(x="date", y="hour", s=3, alpha=.3, linewidth=0, marker=".", data=df)
ax.set(xlim=(2014.5,2020), ylim=(7,25))
ax.invert_yaxis()
sns.despine()
ax.get_figure().savefig("plot.png", dpi=400)
This gives us: